Monday, June 23, 2008

Welcome Baby Dayyán

click to enlarge photo On June 20th I pulled out photo album #11 and drifted backwards in time - back to the first year of life, of our first child, Aaron David. I looked at the rapture in those young faces and once again relived the incomparable beauty of that first birth experience. I looked at my children’s grandparents and marvelled at how young they were, but somehow they too had that magical expression of joy on their faces. I remember being secretly thrilled that our son was such a perfect miracle - being in awe at his ten fingers and ten toes, and peaceful lovely face. I remember also being overwhelmed by the task that lay before us, the trauma of trying to nurse a baby, the fear of him not getting enough milk, the hope for a healthy life and wonderful future for this innocent one and the scary responsibility of caring for this child, a responsibility that now stretched on in an endless line.
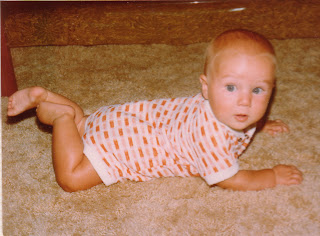
Aaron David Phelan, 3 months
Now that was yesterday, the day after I was placed in my own grandmother’s lap, and this is today when I became a grandmother for the first time myself. Ann Morse put it well when she said: “The history of our grandparents is remembered not with rose petals but in the laughter and tears of their children and their children's children. It is into us that the lives of grandparents have gone. It is in us that their history becomes a future.”

click to enlarge photo click to enlarge photo

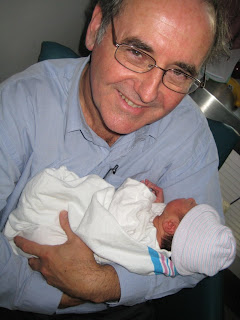
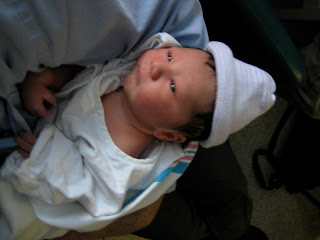
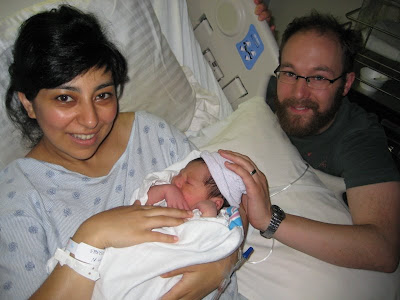
Our daughter in law, Nagmeh, went into labour three weeks early, much to everyone’s surprise. Her labour was about 18 hours long with several stops and starts in the process. The baby was born at Women’s College Hospital in Toronto at 12:56 am on June 20th, 2008 and is healthy and peaceful. He was 6 pounds 10 ounces in weight and 52 cm (20.47 inches) long. Nagmeh’s mother Freshteh and Aaron, were present at the birth.

We travelled to Toronto later that day to meet our grandson for the first time. Amber arrived at the hospital just before us so we were able to greet him as a family. We spoke with Miranda earlier in the day too in order to share our news, and I think she was more excited than the rest of us. Arthur and I kept pinching ourselves as this realization hit home.
click to enlarge photoclick to enlarge photo

The child has been named Dayyán Sutherland Phelan. Dayyán is a Persian name, that of a Baha'i hero who was martyred for written arguments in defence of the Faith, during the trying period of Baha'i history between the ministry of the Báb and that of Bahá'u'lláh. Sutherland is a Canadian Bahai, an architect who designed the famous Shrine of the Bab. Arthur thinks the name will get short formed to David and I’m thinking Daannn ...... Dan the Man!!! In any case it is guaranteed that he will get tired of telling people how to spell his name, but it does look nice, kind of artistic, in print!!! I guess this is a deja vu as I remember how weird people thought our name for “Miranda” was. They just shook their heads. I had to have Aaron practice saying it for a few weeks in order to convince Arthur to agree to let me use it for her.

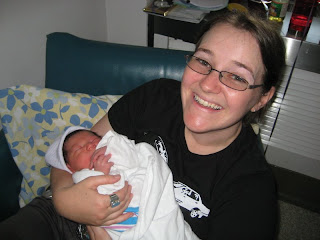
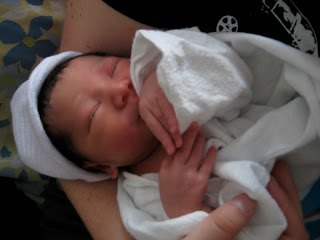
Well it is going to take awhile before I get used to being called Grandma Nanci. It makes me feel so old and I’m trying not to go there. Someone once said that “Grandchildren are God's way of compensating us for growing old” so I am delighted that I will have the opportunity to experience the many blessings that being a grandparent holds. It felt strange to hold our wee babe, to look into his peaceful face, so brand new to this world, his skin so soft and untouched, his little lower lip quivering as he reacted to hidden stimuli. It was kind of funny as he likes to put his hand over his face. Someone said that he was not ready for pictures yet!!! The look on Arthur and Amber’s faces when they held Dayyán, was quite wonderful, topped only by that of Aaron and Nagmeh as they were united with this offspring from their womb.
click to enlarge photo click to enlarge photo

My deepest sorrow is that my own parents and Arthur’s mother are not here to share this joy with everyone. They would have been so enthralled. Life has a way of going forward when we least expect it. But we are thrilled that Miranda has chosen this time to visit Canada and are really looking forward to seeing her soon and sharing our joy. Alex Haley says that “Grandparents sort of sprinkle stardust over the lives of little children.” They hold our tiny hands for just a little while, but our hearts forever. Would that Arthur and I can live up to this expectation. Meanwhile, after a year of so many sad deaths in our family, I am humbled by this birth and filled with the miracle of his tender new life with so many dreams ahead. Already we are drawn into his web of hope and love.

YOU ARE INVITED TO A SUMMER PARTY:

To meet Dayyán and

Greet Miranda and Ralph before

they return to Australia

Sunday, July 20th, 2008

We are at home all day.

R.S.V.P.

Tuesday, June 17, 2008

CVI Windows

Reconstruction of 13 windows for a high school in Guelph.

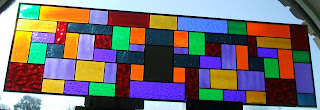
One day last fall our neighbour, who has a business installing windows, approached me with an interesting and very challenging project. Apparently he had just replaced a whole hallway of windows for CVI Centennial Vocational High School in Guelph, and because of differing sized openings in the brick, the 14 lower stained glass windows needed to be rebuilt in order to fit into the new spaces.

click here to enlarge

Since the existing stained glass windows had been designed as a school project, by graduating students over the past 14 years, they present a colourful array of unique designs using the traditional lead kame construction process, as follows:
  • strips of lead must be cut to size, fitted around each piece of glass and then soldered at the joints only
  • after all lead pieces are in place, putty is forced under each strip using a putty knife
  • chalk dust is applied to the entire surface, then rubbed in with a brush in a circular motion
  • care is taken to keep the putty under the edges of the lead strips, while the chalk begins to cure the putty and burnish the strips
  • the window is left to harden for at least 48 hours
  • excess putty is scraped off around every piece of glass
  • the window is vacuumed to remove all the loosened putty and dust, then cleaned with windex
This differs from the more modern foil process (my usual mode of work), in which each glass piece is wrapped in foil and soldered along the entire length of the glass.

Window #1: Grads of 94 - completed Mar 1, 2008

click to enlarge photo

Before

click to enlarge photo

After


With this prototype window, I approached the job with trepidation because of the many challenges bulleted below. It would actually be almost easier to redo the entire window, and just about as cost efficient, but the client wants to maintain as much of the original window as possible. My goal is to make the changes seamless and incorporate them into the design so they do not look like "add ons."
  • when removing the old lead, the hardened putty must be scraped out carefully as the glass can easily break
  • it is difficulty tracking down the original glass or finding compatible substitute glass
  • challenge of deciding which parts of the glass to replace relative to glass availability, structural issues and design considerations
  • need to keep design integrity and flow, within the constraints of a very small border around the outside needing to be replaced
  • there is not much area to work with and the window can become weakened structurally
  • after deconstruction there is no longer an obvious pattern to follow, so new pieces must be created one at a time, using paper templates and fitting each carefully
  • as the project evolves, it is always difficult to keep the window within the proper outside dimensions
  • difficulty handling the weakened window after deconstruction; sometimes I have to hold the entire wobbling window while trying to grind off parts of pieces that are still puttied in place

For Grads of 94, I discovered that the turquoise background glass is no longer made. With this I made the design decision to replace the gold rippled glass on three sides, leaving the top edge intact. Borders needed to be created at each end and extra leaves had to be inserted into the water-bed to stretch out the design. Pieces of glass that were wider at the top edge had to be broken before removal and then new paper pattern pieces created. The window took 11 hours to complete and to my delight, maintained design integrity and strength.

The window was delivered to the client in March and approval was given for me to complete the job. I was thrilled that I was able to actually accomplish the job and am looking forward to the challenge ahead. As you will see in the ensuing windows; each is a unique puzzle to be solved. Oh yes, I do like challenges.

Window #2: Grads of 95

click to enlarge photo

Before

click to enlarge photo

After

  • a small purple border was on the top part of the side ends to tie in with the sky
  • then the pieces from the bottom row of water were removed and blended together with another shade of blue to create an additional row of water, thus increasing the height of the window

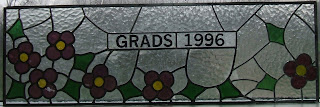
Window #3: Grads of 96

click to enlarge photo

Before

click to enlarge photo
After

  • since there were several cracks around the word "of" the name panel needed to be removed, as well as the large bottom piece on the right hand side which was also cracked
  • the cost to refire the word "of" would have been $50.00 so I decided to elminiate the word and shorten the name panel
  • lucikily I was able to track down the same clear hammered background glass
  • additional leaves and a flower were created to balance the design out so the panel could be widened
  • all glass from across the top and on the right hand side was removed and replaced
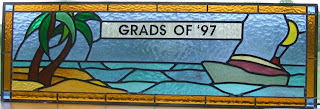
    • Window #4: Grads of 97

      click to enlarge photo
      Before

      click to enlarge photo
      After

      • the narrow rust coloured border which was created around the outside of this piece frames the island scene nicely and enhances the original design
      • I was able to find one small piece of blue hammered glass, just enought to tie in the corners

      Window #5: Grads of 98

      click to enlarge photo
      Before

      click to enlarge photo
      After

      • this was the last window I completed as it was the most challenging
      • it was one of the two windows that had been done in foil rather than lead work so was much harder to take apart
      • the original window had several large cracks so the centre sky panel and the moon had to be removed as well
      • the antique seedy blue sky glass that had stars etched on it, was impossible to replace
      • luckily I was able to locate a small piece of glass that matched the ground on the left, so I created rocks in the cracked area
      • the cracked moon was replaced but in a milky rather than a solid white glass
      • a purple border was added, in an attempt to pick up some of the purple hues throughout this rather eclectic piece
      • since I was concerned that the narrow foil border might not be structurally sound, I added in some green blobs as an overlap betweent the border and the inside part
      • if you look carefully you will see a little bug on the ground and the painted and kiln fired angel was designed by a grad student from an earlier year

      Window #6: Grads of 99

      click to enlarge photo
      Before
      click to enlarge photo
      After

      • if you enlarge this window you will notice dancing figures in the background
      • a second border was added to enlarge this window and I found a lovely piece of turquoise green stripped glass that ties in with some of the internal pieces
      • when the outside lead was removed from this piece, the window was a very crooked rectangle so it was very difficult to hold the original window up the grinder and try to even it up before adding the border

      Window #7: Grads of 2000

      click to enlarge photo

      Before

      click to enlarge photo

      After

      • modelling from the original geometric bar design, I was able to enlarge this window by putting borders on the bottom and both ends; so in essence I only had to replace 3 sides
      • found a German antique glass that is almost the same colour as the glass behind the writing

      Window #8: Grads of 2001

      click to enlarge photo
      Before
      click to enlarge photo
      After

      • this is the only other window that was done in foil rather than lead
      • the zinc metal around the outside was very difficult to remove
      • I was able to locate several pieces of glass that were the same colours as the original pieces, but not the same texture, though some of the textures were the same but just occurring in different colours
      • created a new border of various sized rectangles along the top and the right hand side only
      • Grad year writing is on a mirror which is now slightly off centre, but not noticeable because of the way colours were chosen for the new rectangular pieces

      Window #9: Grads of 2002

      click to enlarge photo
      Before
      click to enlarge photo
      After
      • added a solid white border all around the outside
      • this simple addition seems to really enhance the original design and picks up from the crested wave theme
      • once the original lead was removed from the outside, the rectangle was very crooked; this required a double seam in the upper right corner area

      Window #10: Grads of 2003

      click to enlarge photo
      Before
      click to enlarge photo
      After

      • since there were no cracks in this window and since the background pieces were too large to remove, without redoing the whole window, I found a solid mauve glass that blended well into the design and created a simple, narrow border around the entire outside of the window
      • adding corner pieces made the window stronger and making them a clear mauve, almost the same as the large swirls, tied the work together
      • it was a challenge to make the rough edges from under the lead border balance, especially on the left side
      • I was nervous that the narrow border would not be strong enough since the line is continuous with no overlapping pieces of glass which normally add structural strength
      • however the piece remained sound and the new border added character
      • this piece should be handled with care because of the long seams

      Window #11: Grads of 2004

      click to enlarge photo
      Before
      click to enlarge photo
      After

      • there were bad cracks in the white band across the centre but not on the name panel, so this necessitated removing that band
      • I was able to find a clear antique mauve glass, almost the same as the backgroung glass
      • I added a band to the right hand side to widen the piece, then a second band below the white band to increase the height
      • the glass used in the new band was an interesting fractures and streamers glass containing green and mauve chips
      • I felt this gave the window more interest and character as there was already too much mauve and white; a third colour was needed
      • then I replaced the lower border with the same mauve glass as that used in the right corner band
      • the wing tip on the bird also needed to be redone and extended

      Window #12: Grads of 2005

      click to enlarge photo
      Before
      click to enlarge photo
      After

      • a solid orange border was added around the outside, making a tie in as well as a contrast to the interior orange colours
      • since the original outside lead was very wide, there was a half inch area at each seam that did not have any lead there, so each of these seams had to have small pieces of lead added in before attaching the border

      Window #13: Grads of 2006

      click to enlarge photo
      Before

      click to enlarge photo
      After

      • added a border all the way around in greens and yellows
      • this enhanced and framed the design effectively
      • the bottom centre brown rippled piece of glass had a crack so a seam was created where the crack was

      Closing Comments

      The windows were completed by June 17, 2008 and it took 125 hours of labour and about $600 in materials. It was quite a process handling these large windows and juggling them around choosing colours to match and trying to hold up entire windows to the grinder. Normally you just grind piece at time before they are soldered or leaded together. Each window had to be puddied and then left to dry for three days while the whiting helped the setting process. The dust was vacuumed off the window and the puddie was scraped off several times to remove the overflow that was adherring to the glass. The windows also needed to be washed and windexed and polished. I worked on four at a time so our neighbour could deliver finished windows to the school regularly and there was less to work around in my studio.

      It was a fun project and I feel that I accomplished my goal of rebuilding windows in a way that integrated the orignal design without compromises.


      Monday, June 9, 2008

      Newcomer's Got Hattitude

      Click here to enlarge photo

      The Waterloo Region Newcomers Club closing party for 2008 was held at my home on Wednesday, June 4th. I was hoping, up until the last minute, that we would be able to visit around the pool and eat outside as planned but it was one of those too darned cold "bad weather days". With the late spring and having been away several weekends in May it was a challenge to get the yard and pool cleaned up. I found myself planting outside pots in the dark the night before. Since this is the first large gathering held in my home since moving here, it took awhile to get the logistics worked out for 46 people.

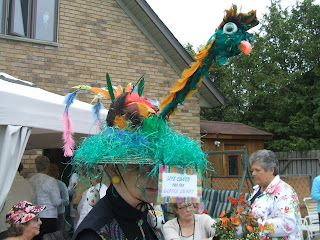
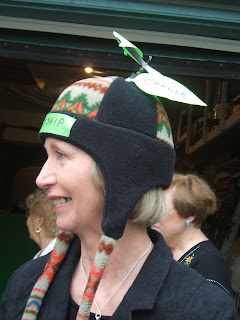
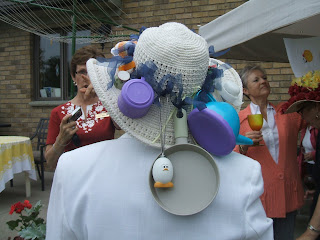
      In the end we did manage to stay outside for the ceremonial part of the event. Ladies had been asked to wear funny hats for a hat parade and competition. This seemed like a tall order for me but I managed to put together a family hat, with photo buttons of my kids and a nylon face thing Aaron had made me years ago when he was in public school. I thought the whole thing was kind of silly, but you will see from the photos on Flickr that many ladies rose to the occasion. Those of us with "hattitude" marched around the pool singing "In Your Newcomer's Bonnet, With all the frills upon it"..... in tune to the Easter Parade song. It was a hoot.

      Our offbeat artist, Jockie Loomer-Kruger won for the funniest hat in her rendition of being chief consultant to the Easter Bunny.

      click here to enlarge photo click here to enlarge photo


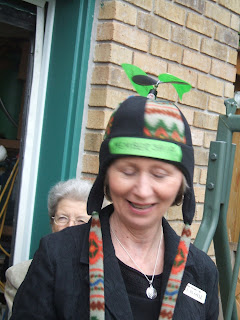
      Carole Russell must have stolen from her children to come up with a prize for the most original hat.

      click here to enlarge photo click here to enlarge photo

      Betty Caron who works at Paderno, wore a hat featuring products from her store and won the prize for the most creative hat.

      click here to enlarge photo click here to enlarge photo

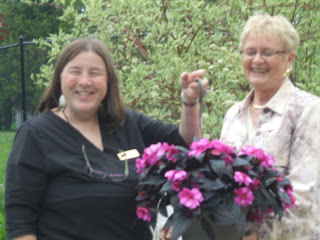
      Cecilia and Nanci were given hanging baskets as thankyou presents.

      click here to enlarge photo click here to enlarge photo

      The pot luck meal was delicious. People were seated all over the house, even 18 people upstairs in the glass studio.

      A great time was had by all - lots of laughter - and one lady even stayed for a sauna under the stars. It will be interesting to see what the club can come up with for next years happy closing!!!